Disclaimer: This post includes affiliate links that I may get compensation from if you decide to make a purchase. Thank you for the support!
Amazing Grace Blissful Slouchy ~ Free Crochet Pattern…

Amazing Grace Blissful Slouchy ~ Free Crochet Pattern…

Amazing Grace Blissful Slouchy

Amazing Grace Blissful Slouchy - Free Crochet Pattern

If you love this pattern- Save it to your Ravelry queue and favorites for easy access…    CLICK HERE


To Celebrate our Amazing Grace Crochet Charity Drive… Here is my 10th Amazing Grace Free Crochet Pattern!!

Keeping in the style of the Amazing Grace Stitch Pattern… This hat pattern is a variation of the Amazing Grace Blissful Beanie,,, It is the same great style, with a fashionable slouch effect!  The Amazing Grace Free Crochet Pattern Series is dedicated to Breast Cancer Awareness and my dearest friend Sandra Kay Gilb who passed away in 2007 from this unfortunate disease.  Please consider paying it forward to those who are suffering or recovering from cancer by donating items made from my free patterns…

~~~~~~~~~~~~~~~~~~~~~~~~~~~~~~~~~~~~~~~~

Amazing Grace Blissful Slouchy

Materials

Yarn ~ 125-150 yards Worsted Weight Yarn Total(Pictured above is Vanna’s Choice by Lion Brand Yarn)

Color A~Main Color

Color B~Accent Color


Although all worsted weight yarn is  graded to be a #4, there is variance between brands… I found Red Heart With Love and Lion Brand Vanna’s Choice to be a great weight for this hat and  also soft.  Caron Simply Soft was wonderful for the softness, but made the hat slightly smaller.

Hook ~ I

Scissors and Yarn Needle


Gauge

Using Vanna’s Choice and a Clover Hook… My personal gauge in a Half Double Crochet swatch is:  6 Sts x 5 Rows = 2″ x 2″.


Stitches

St – Stitch    Sk – Skip     Sl St – Slip Stitch    Ch – Chain     Sc – Single Crochet     HDC – Half Double Crochet     FPSC – Front Post Single Crochet


Instructions

Begin with a Magic Circle (Video Instructions)

Row 1:  Ch 1 (Does not count as 1st St now and through out), 10 HDC in Magic Ring.  Tighten Ring by pulling on loose tail.  Join with Sl St to  top of 1st HDC. = 10 HDC

Row 2:  Ch 1, 2 HDC in 1st St and 2 HDC in each St around, Join to top of 1st HDC. = 20 HDC

Row 3:  Ch 1, *2 HDC in 1st St, Hdc in next St,* Around.  Join with Sl St to top of 1st HDC. = 30 Hdc

Row 4:  Ch 1, *2 HDC in 1st St, 1 HDC in next 2 Sts.* Around.  Join with Sl St to top of 1st HDC.  = 40 HDC

Row 5:  Ch 1, Hdc in each St Around. Join with Sl St to top of 1st HDC = 40 HDC

Row 6: Ch 1, *2 HDC in 1st St, 1 HDC in next 3 Sts* Around  Join with Sl St to top of 1st HDC. = 50 HDC

Row 7:  Ch 1, Hdc in each St Around. Join with Sl St to top of 1st HDC = 50 HDC

Row 8:  Ch 1, *2 HDC in 1st St, 1 HDC in next 4 Sts* Around  Join with Sl St to top of 1st HDC. = 60 HDC

Row 9:  Ch 1, Hdc in each St Around. Join with Sl St to top of 1st HDC = 60 HDC

Row 10:  Ch 1, *2 HDC in 1st St, 1 HDC in next 5 Sts* Around  Join with Sl St to top of 1st HDC. = 70 HDC

Row 11:  Ch 1, HDC in each St Around. Join with Sl St to top of 1st HDC = 70 HDC

Row 12:  Ch 1, *2 HDC in 1st St, HDC in next 6 Sts, 2 HDC in next St, HDC in next 5 Sts* Around to last 5 Sts, 2 HDC in next St, HDC in last 4 Sts. Join with Sl St to top of 1st HDC. = 81 HDC

Row 13:  Ch 1, Hdc in each St Around. Join with Sl St to top of 1st HDC = 81 HDC

Row 14: Ch 1, Turn, FPSC in each St around. Join with Sl ST to top of beginning FPSC. = 81 FPSC (This is the wrong side now facing you.)

Row 15:  Change to color B, Ch 1, Turn, Sc in each stitch around. Join with Sl St to beginning Sc. = 81 Sc (Right side facing)

Row 16:  Ch 1, Turn, Sc in each stitch around. Join with Sl St to beginning Sc. = 81 Sc  ** See tip at the bottom of the page for lengthening your hat if desired**

Row 17:  Change to color A, Ch 1, Turn, Sc in each stitch around. Join with Sl St to beginning Sc. = 81 Sc

Row 18:  Ch 1,Turn,  FPSC in each St around. Join with Sl ST to top of beginning FPSC. = 81 FPSC (This is the wrong side now facing you.)

Row 19:  Change to color B, Ch 1, Turn, Sc in 1st St, Ch 2, Sc in  same St again, Sk 2 Sts, *(Sc,Ch2,Sc) all in next St, Sk 2* Around, Join with Sl St to beginning Sc. = 27 Ch 2 Spaces

Row 20: DO Not Turn, Sl St in 1st Ch 2 Sp, Ch 3(Counts as Dc now and throughout), 2 more Dc in same Ch 2 Sp., *3 Dc in next Ch 2 Sp(Shell made)*, Repeat * * Around, Join to top of beginning ch 3 . =27 Shells made.

Rows 21 & 22: Repeat Rows 19 & 20 *Important notes for these two rows* Do Not Turn for either of  these rows. You remain working on the right side. AND for Row 21 you will begin by Slip Stitching over 1 St and starting in the center stitch of your shell from the previous row.

Row 23:  Change to Color A, Do Not Turn, Ch 1, Sc Around, Join with Sl St to beginning. = 81 sc

Row 24:  Ch 1, Turn, FPSC in each St Around. = 81 FPSC (Wrong Side Facing again)

Row 25:  Ch 1 Turn, *Sc in next 8 Sc, Decrease over the next 2 Sc’s* Around. Join with Sl St to top of beginning Sc. = 72 Sc

Rows 26 & 27:  Change to Color B,  Ch 1 Turn, Sc Around. Join with Sl St To beginning Sc. = 72 Sc

Rows 28 & 29:  Change to Color A, Ch 1, Turn, Sc Around, Join with Sl St to beginning Sc. = 72 Sc

Row 30:  Ch 1 Turn, FPSC in each St Around. Join with Sl St to beginning Sc. – 72 FPSC.

Finish off and weave in ends.

Congratulations.. You have completed the Amazing Grace Blissful Slouchy!

** To increase the length of your Amazing Grace Blissful Slouchy, You can repeat row 16 as many times as desired.**

Amazing Grace Blissful Slouchy Hat    Amazing Grace Blissful Beanie solid

Here you can see the difference between the Amazing Grace Blissful Slouchy and the Amazing Grace Blissful Beanie…


Amazing Grace Blissful Slouchy Hats - Free Pattern

Stop by the Amazing Grace Crochet Charity Page to see how you can make a difference!! Click here or on the tab at the top of the page

~~~~~~~~~~~~~~~~~~~~~~~~~~~~~~~~~~~~~~~~~~~~~~~~~~~~~

Happy Crocheting!!

Elena


©Copyright 2016 Elena Hunt/Beatrice Ryan Designs.  All of my patterns and posts are my own work. Do not copy them in any way. If you want to share this information with someone, share the link to this post. If you want to share on your own blogwebsite or social media, then you may use the first photo in this post and link back to this post. You may not give away printed copies of this post. Thank you. This post may contain affiliate links/ads. If you purchase something from a link in this post, I may be compensated.


Amazing Grace Blissful Beanie ~ New Free Crochet Pattern

Amazing Grace Blissful Beanie ~ New Free Crochet Pattern

Amazing Grace Blissful Beanie

Amazing Grace Blissful Beanie - Free Crochet Pattern

Click Here…If you love this pattern you can save it to your favorites and queue on Raverly


To Celebrate our Amazing Grace Crochet Charity Drive… Here is my 9th Amazing Grace Free Crochet Pattern!!

Keeping in the style of the Amazing Grace Stitch Pattern… This hat has added texture and is fun to make using more than one color… The Amazing Grace Free Crochet Pattern Series is dedicated to Breast Cancer Awareness and my dearest friend Sandra Kay Gilb who passed away in 2007 from this unfortunate disease.  Please consider paying it forward to those who are suffering or recovering from Cancer or any life tragedy! 

Amazing Grace Blissful Beanie

Materials

Yarn ~ 125-150 yards Worsted Weight Yarn (Pictured above in Brown and Cream is Vanna’s Choice by Lion Brand Yarn)

Shop for your yarn needs at Michaels Craft Store Online!! Affiliate Link

Although all worsted weight yarn is  graded to be a #4, there is variance between brands… I found Red Heart With Love and Lion Brand Vanna’s Choice to be a great weight for this hat and  also soft.  Caron Simply Soft was wonderful for the softness, but made the hat slightly smaller.

Hook ~ I

Scissors and Yarn Needle

Stitches

St – Stitch     Sl St – Slip Stitch    Ch – Chain     Sc – Single Crochet     HDC – Half Double Crochet     FPSC – Front Post Single Crochet

*Instructions for making this hat in multi-color are noted at the bottom of the page

Instructions

Begin with a Magic Circle (Video Instructions)

Row 1:  Ch 1 (Does not count as 1st St now and through out), 10 HDC in Magic Ring.  Tighten Ring by pulling on loose tail.  Join with Sl St to  top of 1st HDC. = 10 HDC

Row 2:  Ch 1, 2 HDC in 1st St and 2 HDC in each St around, Join to top of 1st HDC. = 20 HDC

Row 3:  Ch 1, *2 HDC in 1st St, Hdc in next St,* Around.  Join with Sl St to top of 1st HDC. = 30 Hdc

Row 4:  Ch 1, *2 HDC in 1st St, 1 HDC in next 2 Sts.* Around.  Join with Sl St to top of 1st HDC.  = 40 HDC

Row 5:  Ch 1, *2 HDC in 1st St, 1 HDC in next 3 Sts* Around  Join with Sl St to top of 1st HDC. = 50 HDC

Row 6:  Ch 1, 1 HDC in each St Around Join with Sl St to top of 1st HDC. =50 HDC

Row 7:  Ch 1, *2 HDC in 1st St, 1 HDC in next 4 Sts* Around  Join with Sl St to top of 1st HDC. = 60 HDC

Row 8:  Ch 1, *2 HDC in 1st St, 1 HDC in next 9 Sts* Around  Join with Sl St to top of 1st HDC. = 66 HDC

Row 9:  Ch 1, *2 HDC in 1st St, 1 HDC in next 10 Sts* Around  Join with Sl St to top of 1st HDC. =72 HDC

Row 10:  Ch 1, *2 HDC in 1st St, 1 HDC in next 23 Sts* Around. Join with Sl St to top of 1st HDC. = 75 HDC

Row 11:  Ch 1, Turn, Work FPSC in each St Around. Join to top FPSC. = 75 FPSC

Row 12:  Ch 1 Turn, Sc in each St Around. Join to top Sc. = 75 Sc

Row 13:  Ch 1 Turn, Work FPSC in each St Around. Join to top FPSC. = 75 FPSC

Row 14:  Ch 1 Turn, Sc in 1st St, Ch 2, Sc in same St as beginning Sc, Sk 2 Sts, *(Sc,Ch2,Sc) all in next St, Skip next 2 St* Repeat * * Around. Join to beginning Sc. = 25 Ch 2 spaces.

Row 15:  DO Not Turn, Sl St in 1st Ch 2 Sp, Ch 3(Counts as Dc now and throughout), 2 more Dc in same Ch 2 Sp., *3 Dc in next Ch 2 Sp(Shell made)*, Repeat * * Around, Join to top of beginning ch 3 . =25 Shells made.

Row 16: Do not turn, Sl St in next St(2nd St of Shell from Prev Row), Ch 1, Sc in same St, Ch 2, Sc in same St, Sk 2 Sts, *(Sc,Ch2,Sc) all in the next St, Sk 2 Sts*., Repeat * * Around, Join to beginning Sc. = 25 Ch 2 Sps  *Tip-The  (Sc,Ch2,Sc) are all done in the middle St of the  Dc Shells from the previous row

Row 17: Repeat  Row 15

Row 18:  Do not turn, Sc in each St around. Join to beginning Sc = 75 Sc

Row 19:  Ch 1 Turn, FPSC in each St around, Join to beginning FPSC. = 75 FPSC

Row 20 – 22: Ch 1 Turn, Sc in each St Around. Join to beginning Sc. =75 Sc

Row 23:  Ch 1 Turn, FPSC in each St around. Join to Beginning FPSC.  = 75 FPSC

Finish off and weave in ends.

Congratulations.. You have completed the Amazing Grace Blissful Beanie!

Amazing Grace Blissful Beanie solid

Amazing Grace Blissful Beanie in Solid

Amazing Grace Blissful Beanie Hats

Stop by the Amazing Grace Crochet Charity Page to see how you can make a difference!! Click here or on the tab at the top of the page

~~~~~~~~~~~~~~~~~~~~~~~~~~~~~~~~~~~~~~~~~~~~~~~~~~~~~

Instructions for Multi-Color Hat

*To make the Taupe and Cream Style Hat on the far left

Main Color : Taupe

Alt. Color: Cream

Rows 1-12 Main Color

Row 13-17  Alt. Color

Row 18-19 Main Color

Row 20-22 Alt. Color

Row 23 Main Color

*To make  just the center a second color like the Blue and White one on the far right

Change to 2nd color for row 13-17, then back to the main color at row 18

Happy Crocheting!!

Elena


©Copyright 2023 Elena Hunt/Beatrice Ryan Designs.  All of my patterns and posts are my own work. Do not copy them in any way. If you want to share this information with someone, share the link to this post. If you want to share on your own blogwebsite or social media, then you may use the first photo in this post and link back to this post. You may not give away printed copies of this post. Thank you. This post may contain affiliate links/ads. If you purchase something from a link in this post, I may be compensated.

Monday Makings ~ Crochet Flower Potholder Review!

Monday Makings ~ Crochet Flower Potholder Review!

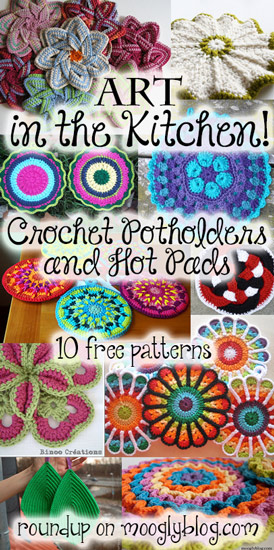
Another Monday and a little fun crochet to share!!  This weekend I decided to break out all the cotton yarn I bought a few weeks ago and get something done…  When I was trying to decide what to make,,, I remembered my friend Tamara over at Moogly had done a Potholder Round Up several months ago… I hopped over to her blog and could hardly decide which potholders I wanted to make…

Crochet-Potholders-and-Hot-Pads

 Click here to see her fun roundup…

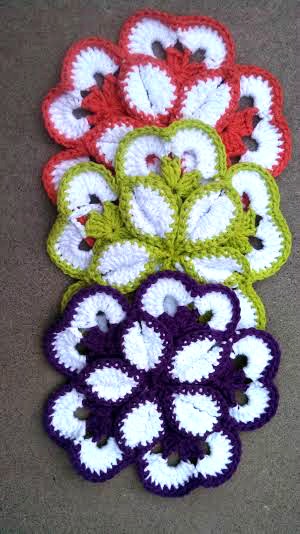
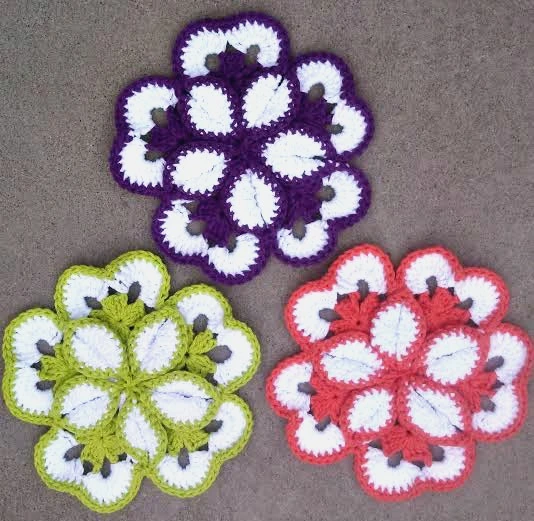
After scouring over all the great patterns… I decided on the Starburst Hotpad by Loretta Schepp… I have been seeing these fun flowers for several weeks now and had been wanting to make some for myself… The pattern is really fun!  It is fairly easy, the only slightly tricky part was figuring out how to join them once all the motifs were crocheted… But once I got it, I whipped 3 out in not time!!  If you would like to make these fun hotpads… Click Here

Flower Potholder Trio

Really fun and easy to make!

Flower Potholder

Bright and Cheery!

3 flowers

Great collection of potholders!!

.

I hope you will give these a try!!!  Have a great week and Happy Crocheting!

Elena

.

.


%d bloggers like this: